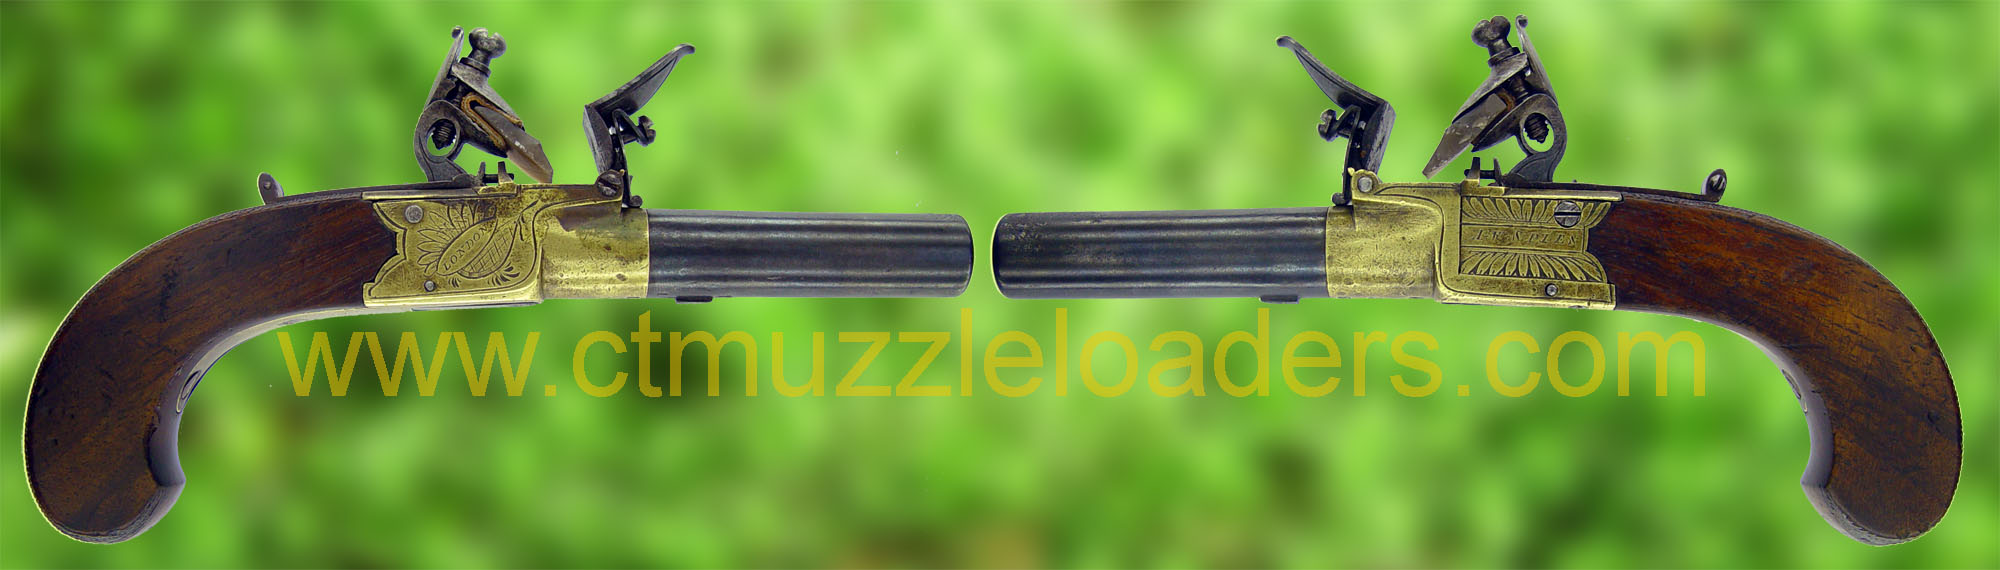
The ones shown here are screw-barrel flintlocks from the early part of the 19th Century. They are marked "AW Spies" and "London". I can't find any reference to an "A.W. Spies" gunmaker in London, but there was a well-known gunmaker by that name who opened a shop in New York City in 1820, and all of his pistols were marked "AW Spies". Since these pistols were manufactured as part of a large lot, they were most likely made for him and marked with his name. This was a very common practice then, as it is today.

Keeping It Safe

 Keeping
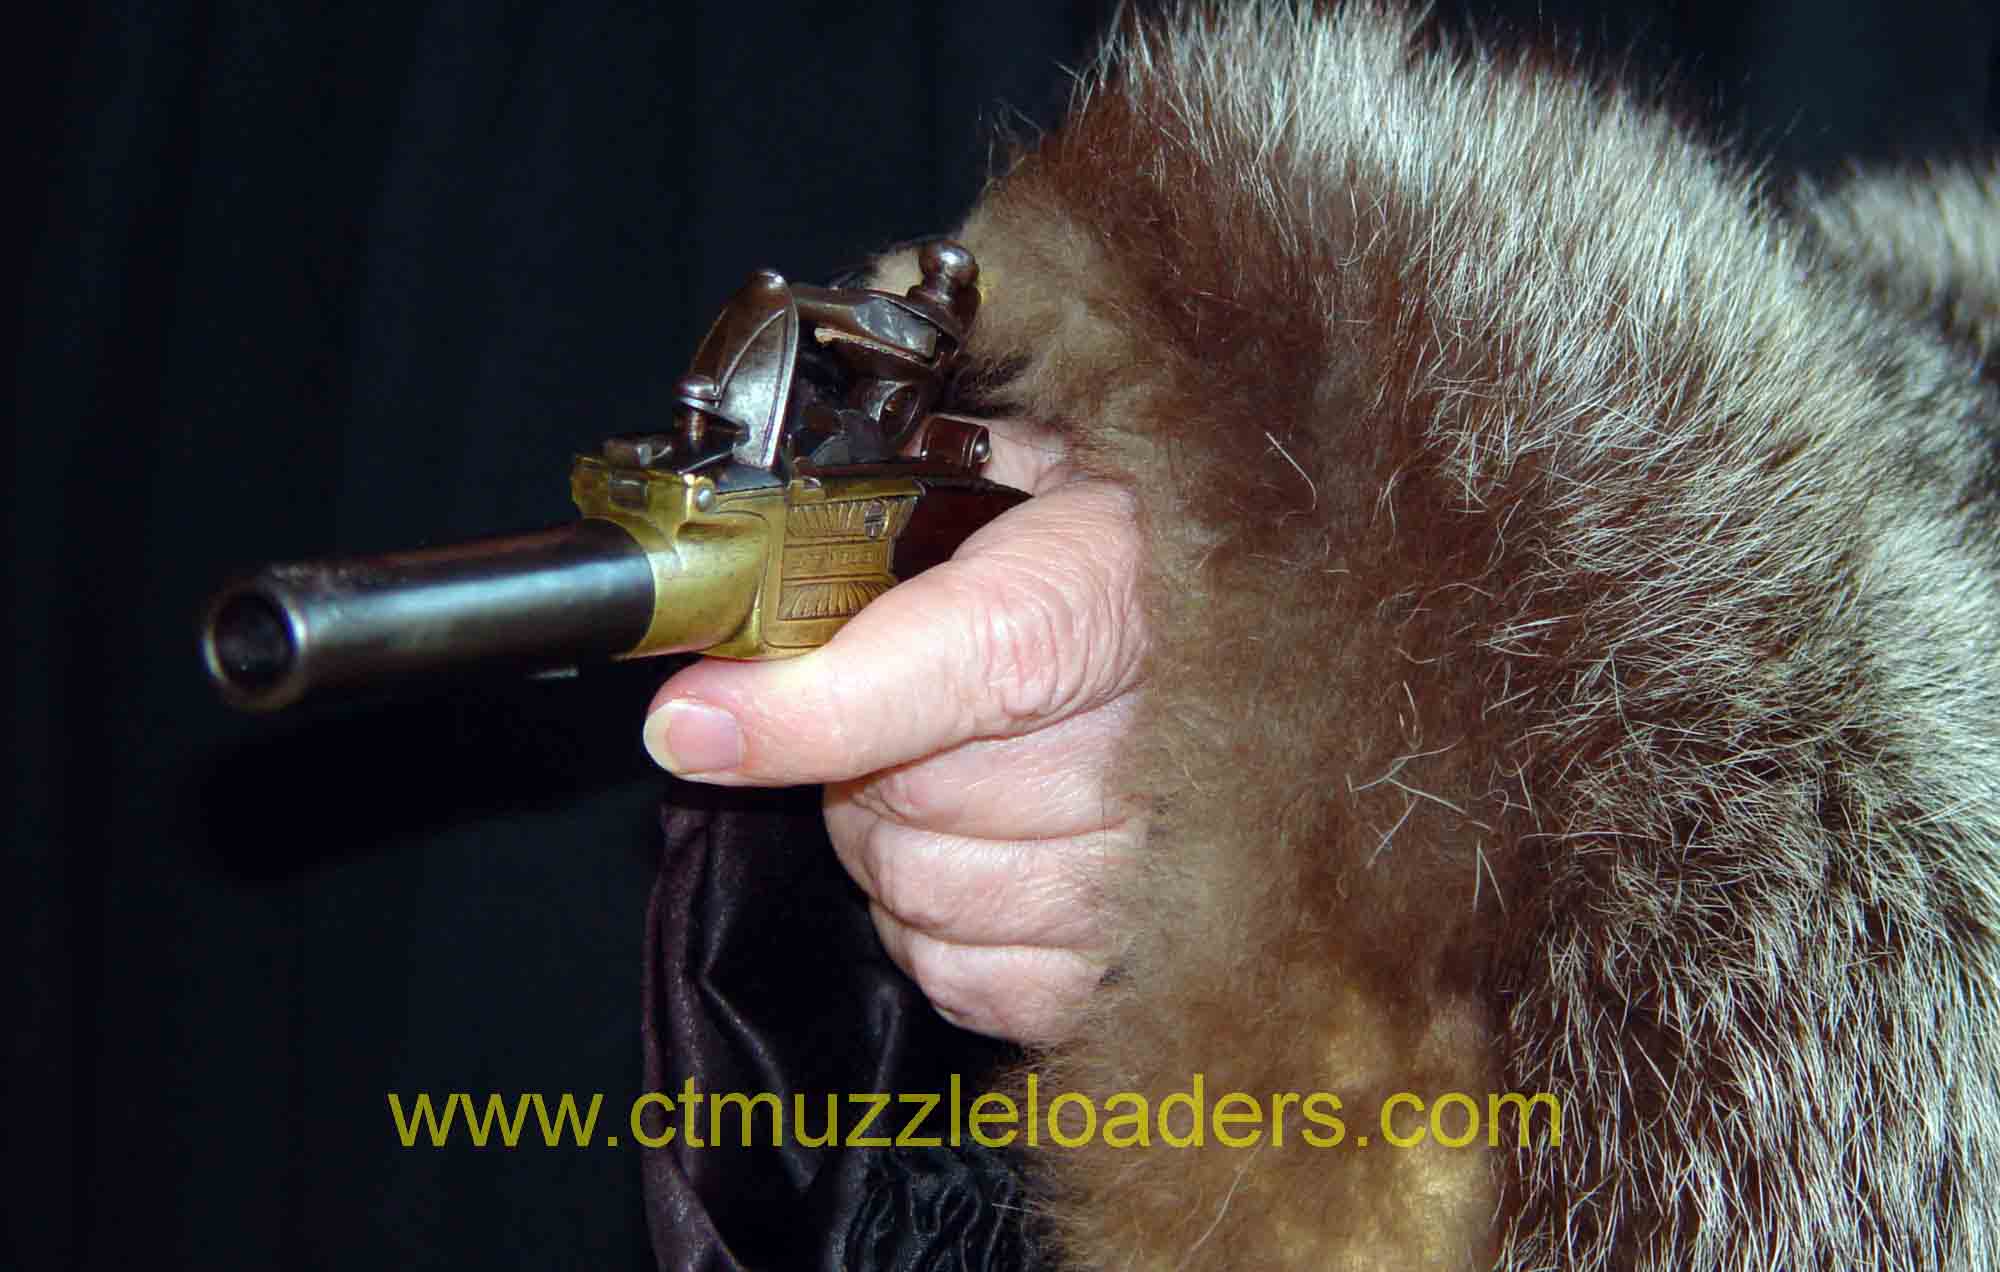
a loaded pistol in one's pocket can be as dangerous to the user as to an assailant, so even the earliest
gunmakers went to great lengths to make effective safeties. The photographs here (click on the image for a
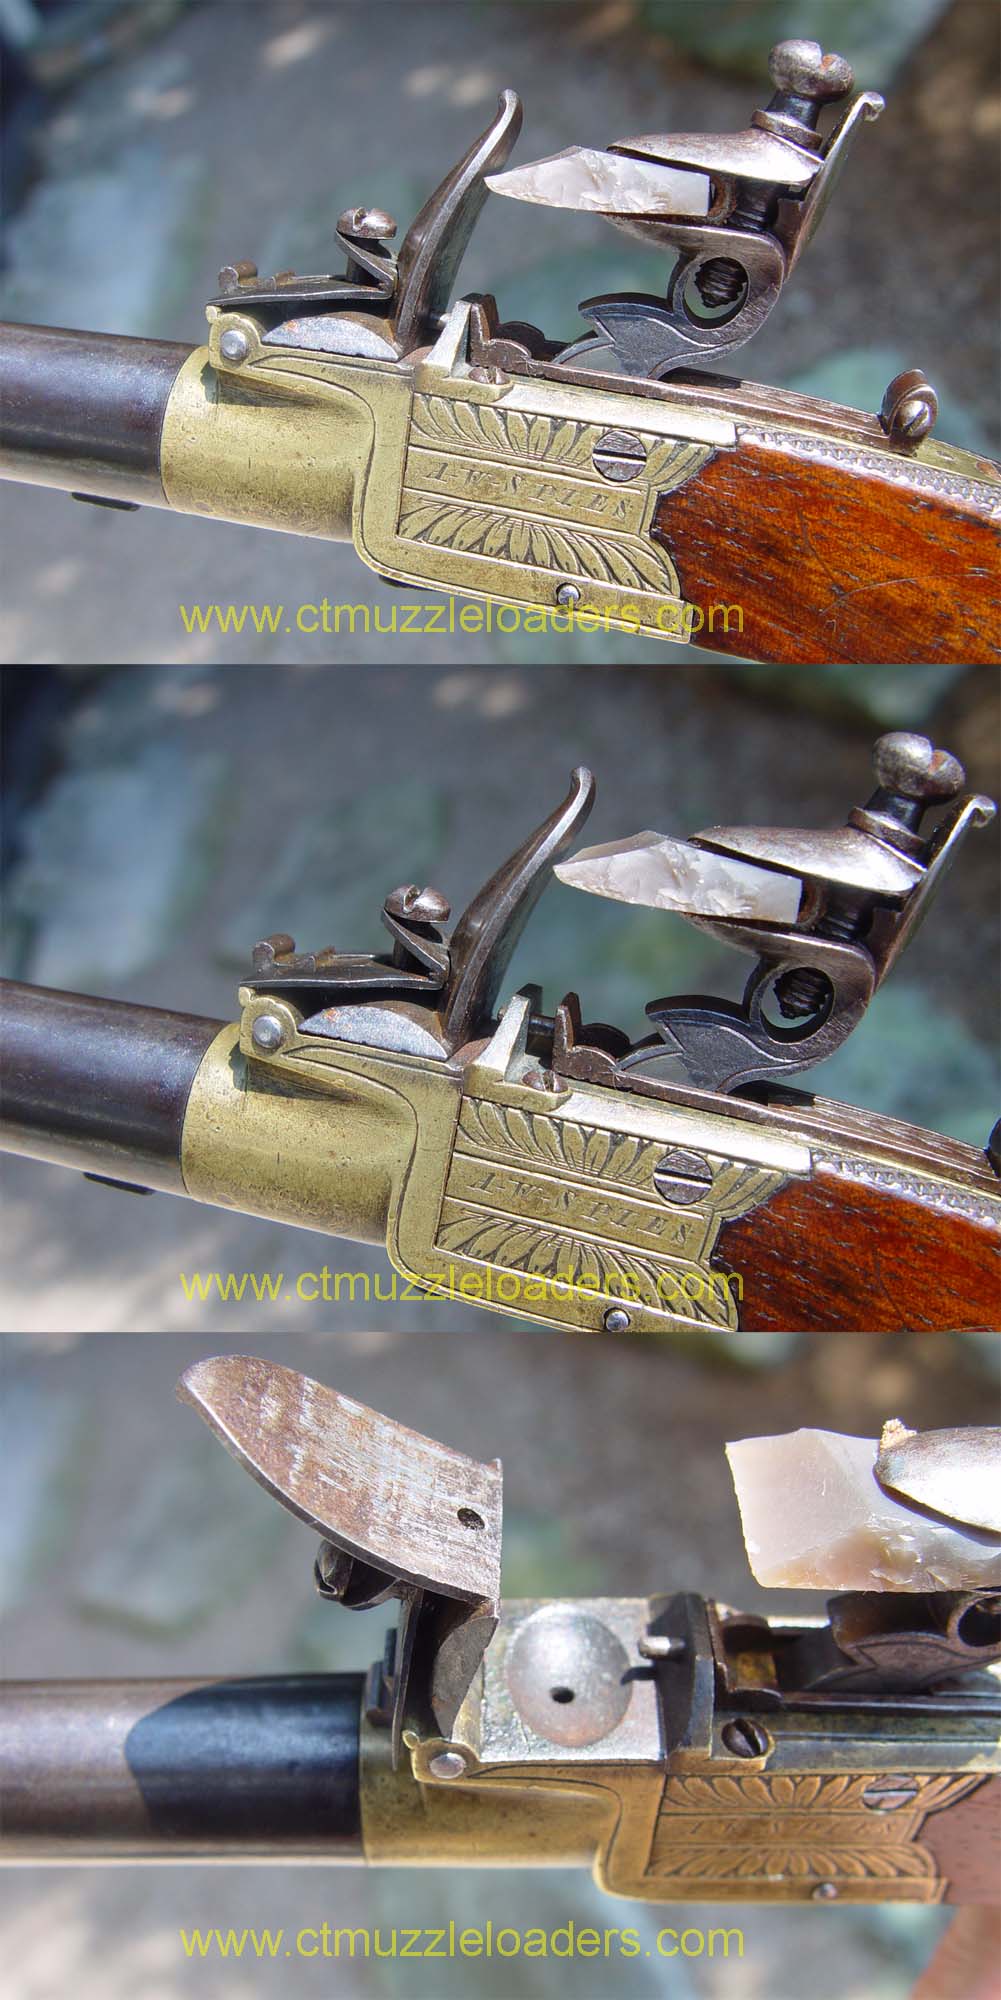
large version) show how the safety does several things at once. In the top of the sequence, the pistol is at
half-cock as it would normally be carried. The safety consists of a sliding bracket which surrounds the hammer
and ends in a small pin which fits into a socket at the base of the frizzen. In its forward (safe)
position, it prevents the frizzen from opening, even if the hammer should accidentally fall. It also prevents
the frizzen from being knocked open while in the pocket and spilling out the priming powder. Below the
bracket, on the underside of the top strap just behind the 'box' of the frame is a hook which is
attached to the safety. When in the safe position, the hook slides under the back of the hammer and prevents
it from being further cocked or from being accidentally knocked out of the half-cock position. Note that the
trigger is still (largely) within the frame so that it can't be snagged or pulled as the pistol is
withdrawn from concealment.
Keeping
a loaded pistol in one's pocket can be as dangerous to the user as to an assailant, so even the earliest
gunmakers went to great lengths to make effective safeties. The photographs here (click on the image for a
large version) show how the safety does several things at once. In the top of the sequence, the pistol is at
half-cock as it would normally be carried. The safety consists of a sliding bracket which surrounds the hammer
and ends in a small pin which fits into a socket at the base of the frizzen. In its forward (safe)
position, it prevents the frizzen from opening, even if the hammer should accidentally fall. It also prevents
the frizzen from being knocked open while in the pocket and spilling out the priming powder. Below the
bracket, on the underside of the top strap just behind the 'box' of the frame is a hook which is
attached to the safety. When in the safe position, the hook slides under the back of the hammer and prevents
it from being further cocked or from being accidentally knocked out of the half-cock position. Note that the
trigger is still (largely) within the frame so that it can't be snagged or pulled as the pistol is
withdrawn from concealment.
In the second frame, the safety has been slid backward to the 'ready' position, which unlocks the frizzen and frees the hammer, allowing it to be fully cocked. In the last frame, the hammer is fully cocked, which automatically drops the trigger. The pistol is now ready to go!
No Snags, Please
 If you are pulling a pistol from a pocket, you
certainly don't want to snag any part of it. Not only can this slow you down, but it may cause an
accidental discharge. The trigger is paticularly susceptable to this, and on tiny pistols there is really no
place for a large triggerguard. The gunsmiths of the 18th Century devised a clever mechanism for solving this
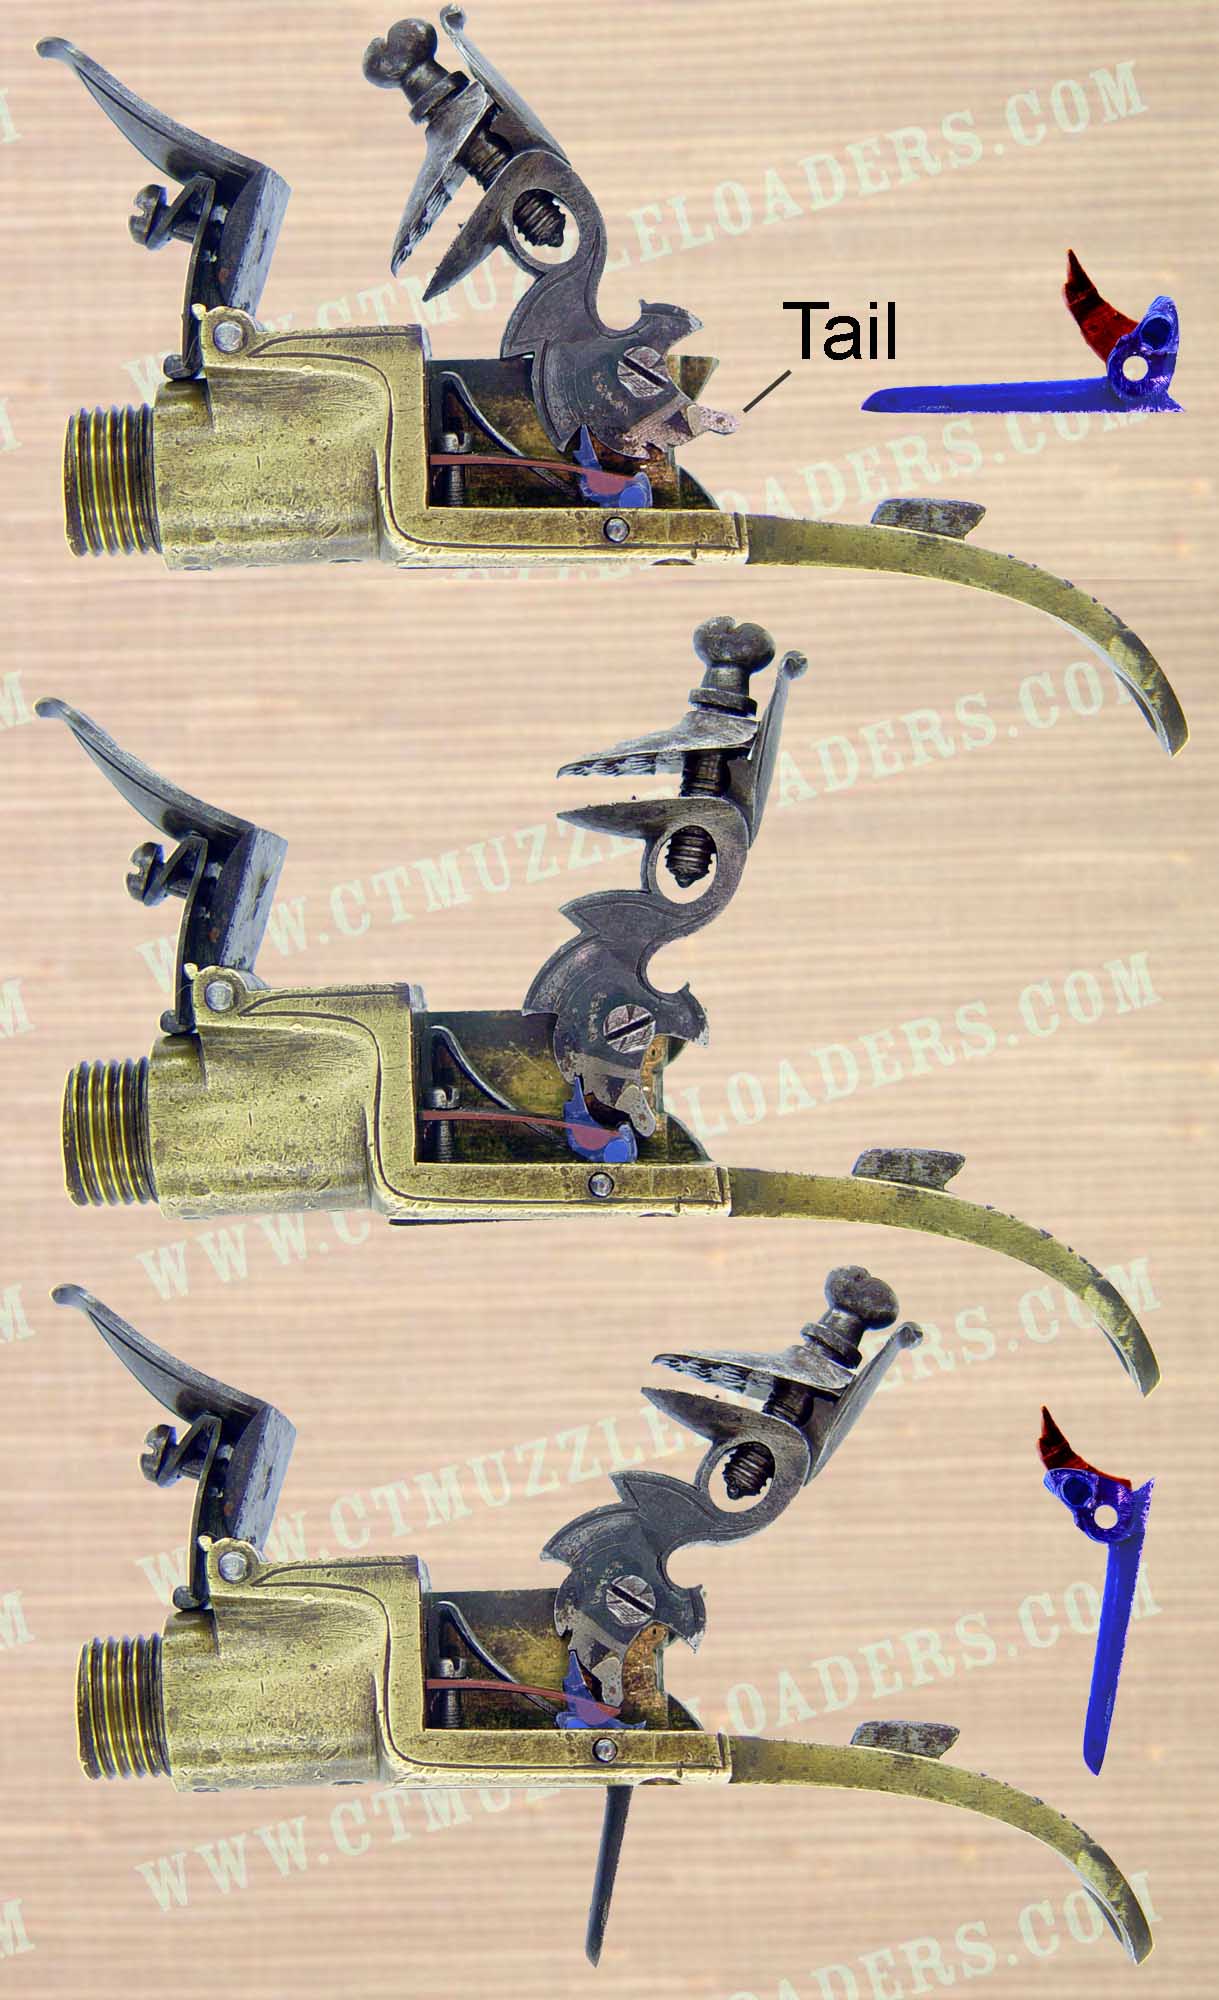
problem - the drop-down trigger. In the top image, the hammer is at rest. At its bottom is a small
protuberance (or tail) which will engage the two-part trigger as it is cocked. In the image of the complete
mechanism, the sear and trigger assembly is tinged blue; the snap-over spring which flips and holds the
trigger in position is tinged red. On the trigger, there is a boss, colored a darker blue, which engages the
spring to form the snap-over mechanism. To the right is an enlargement of the two-part trigger, with the sear
colored red and the trigger proper colored blue (sorry the colors don't match up with those in the
complete mechanism...).
If you are pulling a pistol from a pocket, you
certainly don't want to snag any part of it. Not only can this slow you down, but it may cause an
accidental discharge. The trigger is paticularly susceptable to this, and on tiny pistols there is really no
place for a large triggerguard. The gunsmiths of the 18th Century devised a clever mechanism for solving this
problem - the drop-down trigger. In the top image, the hammer is at rest. At its bottom is a small
protuberance (or tail) which will engage the two-part trigger as it is cocked. In the image of the complete
mechanism, the sear and trigger assembly is tinged blue; the snap-over spring which flips and holds the
trigger in position is tinged red. On the trigger, there is a boss, colored a darker blue, which engages the
spring to form the snap-over mechanism. To the right is an enlargement of the two-part trigger, with the sear
colored red and the trigger proper colored blue (sorry the colors don't match up with those in the
complete mechanism...).
When the hammer is pulled back to half-cock, the sear, which has its own spring, engages the half-cock notch, and the 'tail' is now just touching the back of the trigger. At this point, the trigger mechainsm still looks like it does on the upper-right. However, when the pistol is drawn to full-cock, the 'tail' on the hammer forces the trigger to swing down until the boss slides over the hump of the 'snap-over' spring, popping the trigger fully down. The trigger mechanism now looks like it does in the lower-right enlargement. Since the sear and trigger are now locked together, pulling the trigger releases the sear and fires the pistol. This is a simple and neat little mechanism!
Some Assembly Required

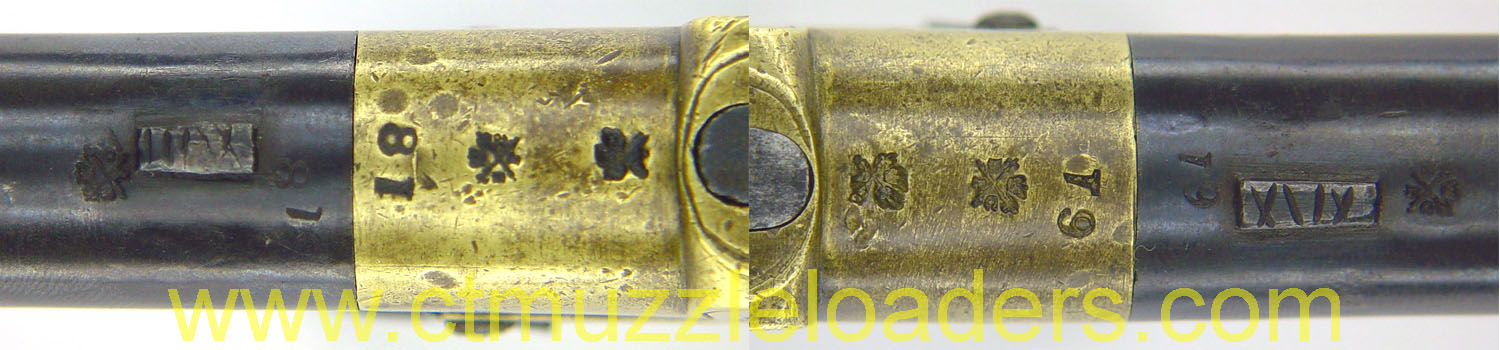
It is clear from these assembly marks that the pistols were made as part of a batch. The pistols in this
set are numbered "18" and "19" on the barrels and frame, and all the parts bear those
numbers scratched or filed in as Roman Numerals (XVIII in this case). These were not serial numbers but were
used to keep track of which parts fit with which pistol as the parts went through the various fitting and
finishing operations. Shown here are the stock, top plate and mainspring (these guys didn't mind a few
scratches on their springs...). Every single part except for the small screws and a pin or two had marks, some
so small they would have needed a magnifier to decipher. This method was widely used in English manufacture,
since there were many guilds responsible for each production stage. I don't know what the situation was
with gunsmiths, but during this period it took 23 separate guilds to build a pocket watch, each guild handling
just one operation or part. The barrels and frame bear Birmingham Company proof marks. At this time in
history, Birmingham was a center for the 'mass production' of less expensive arms, while London was
known for producing higher quality weapons.
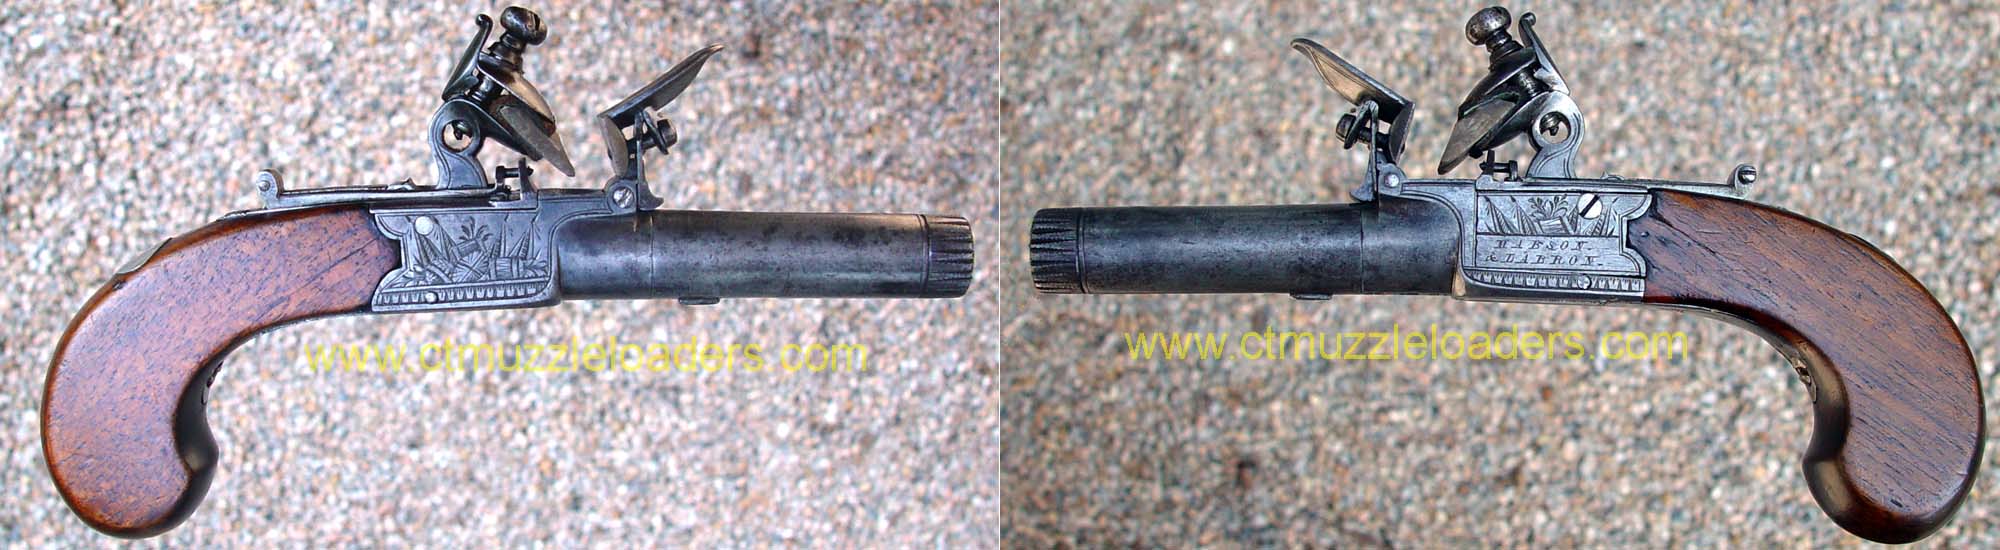
Above is a nice example of a .42 caliber steel-frame 'muff pistol', also made in Birmingham. The engraved name "Mabson & Labron" is from a firm of that name in Dunderdale, who were both gunmakers and 'factors', or traders. Because of its Birmingham proofs, it is likely that this gun was made for them rather than by them.
The Complete Self-Defense Kit
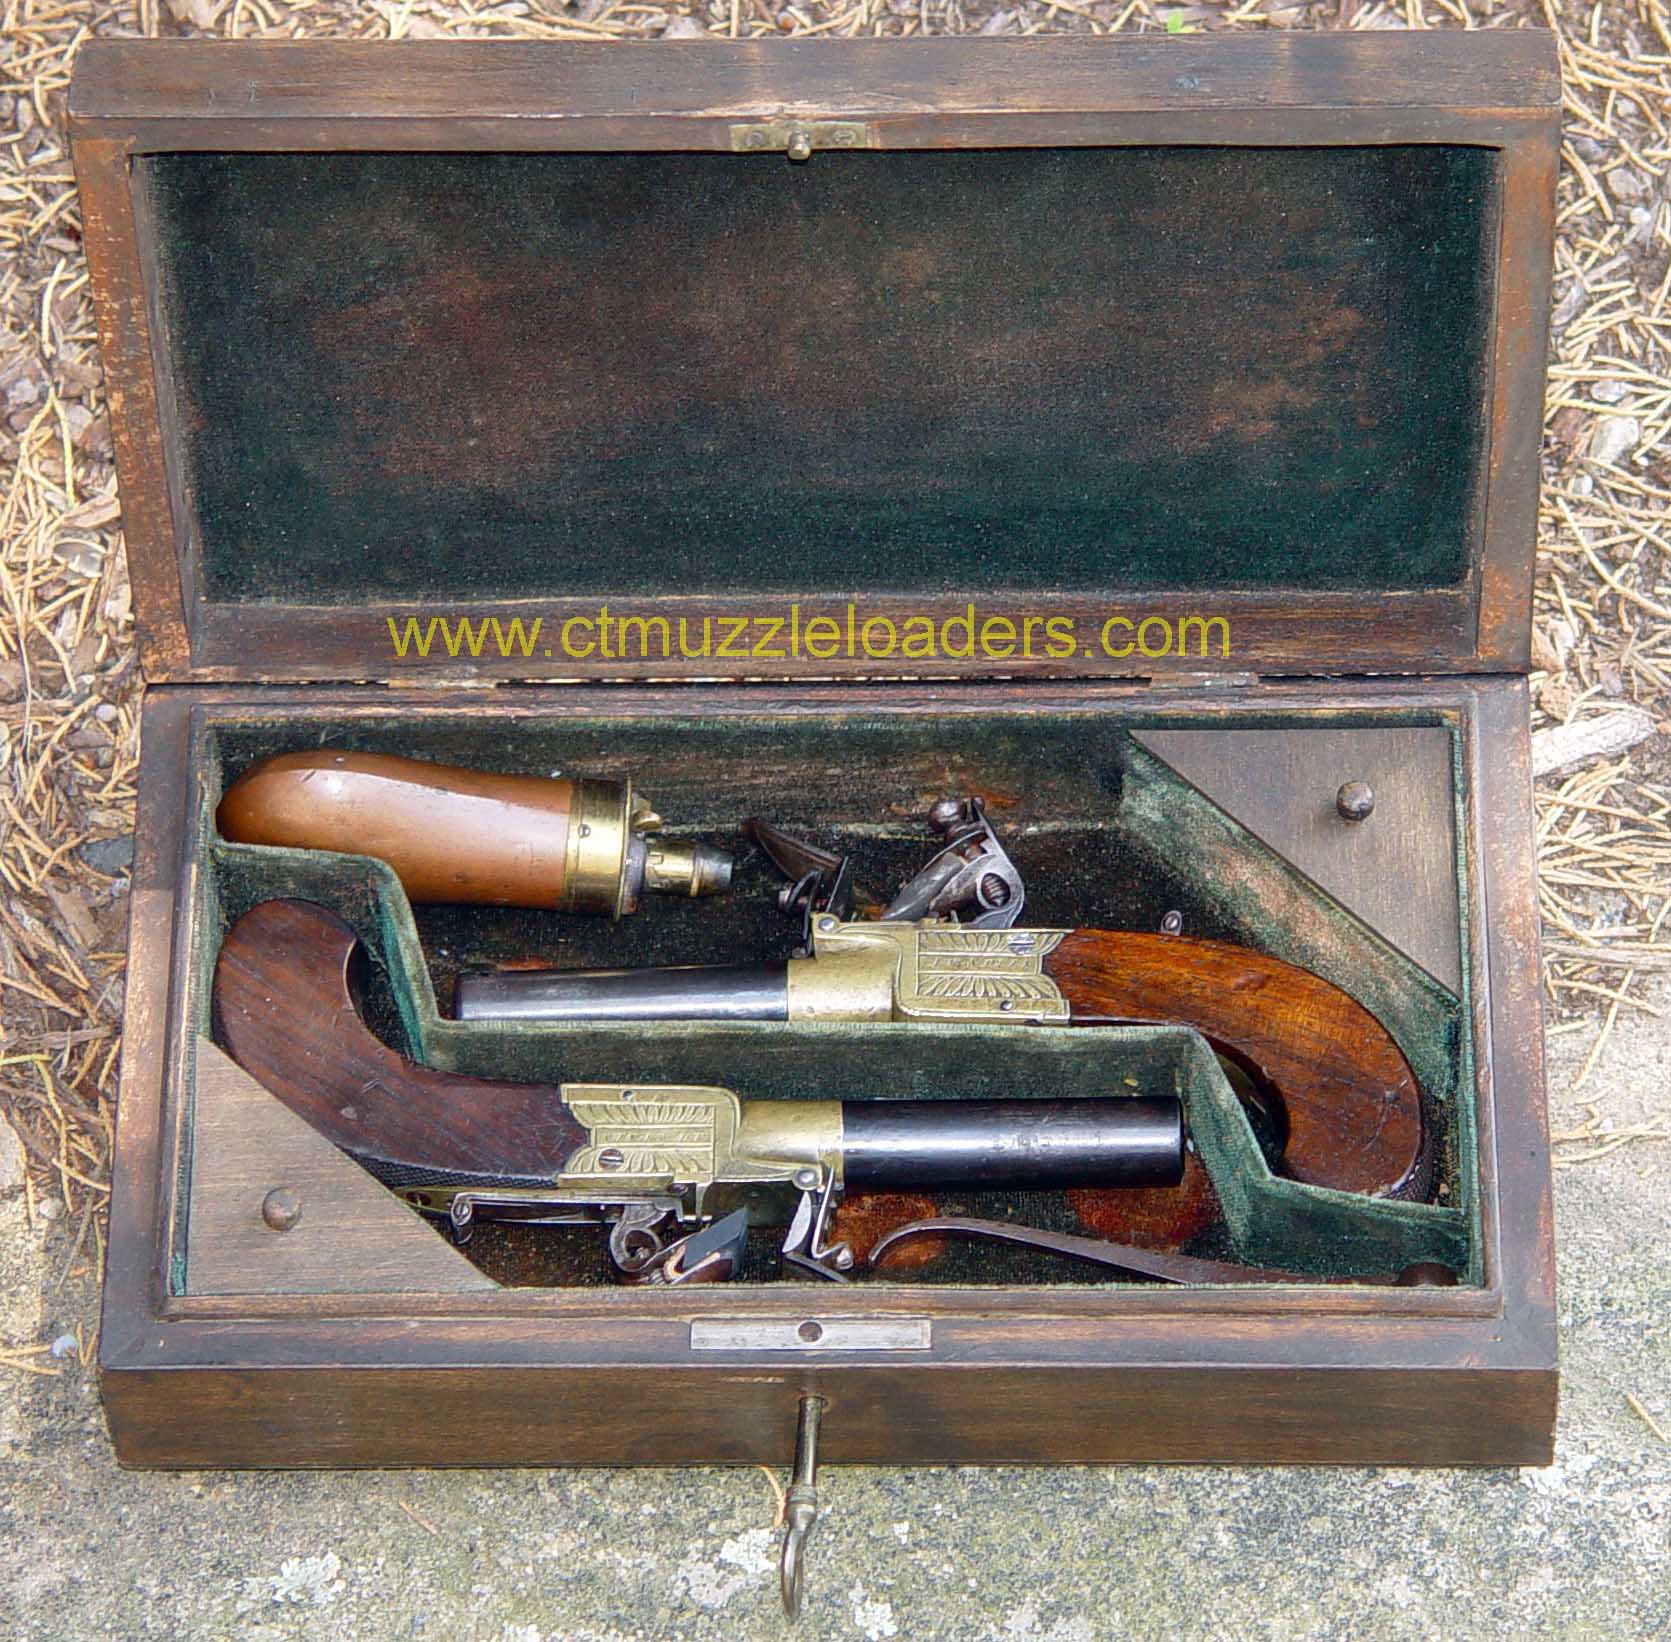
The boxed pistols would have included a powder flask, balls, bullet mould, flints, plus perhaps a turn-screw and cleaning rod. This box, which is probably original, is of modest quality by the standards of the day but is in keeping with the pistols. The powder flask is not likely the original, nor is the bullet mould, which is for a .395 caliber ball as are the old, corroded lead balls in the box.
Would It Stop Them (or just make them mad)?
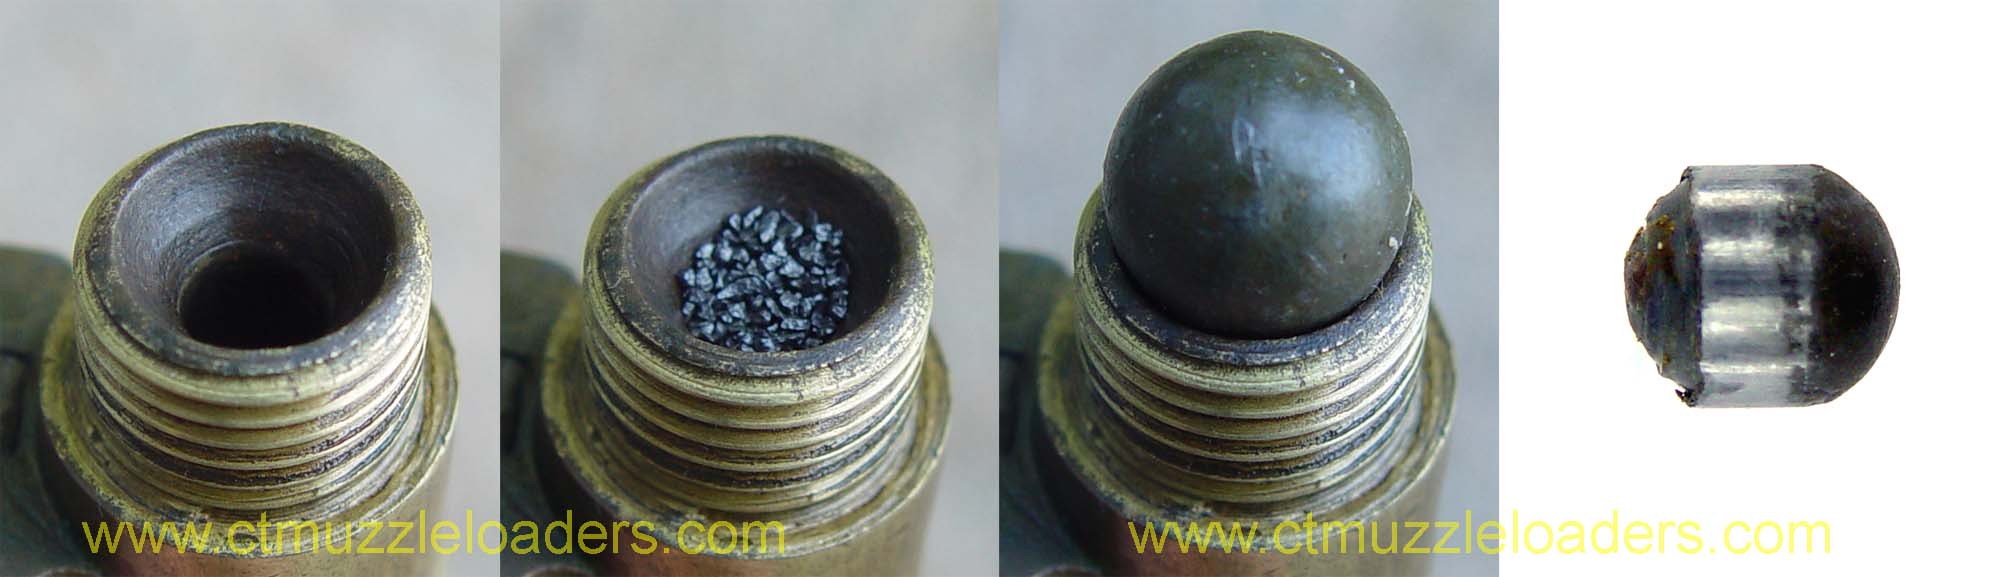
The powder chamber holds only 10 grains (7 grains in the steel-frame pistol), and with a two inch .42 caliber barrel, one might think that being shot with one of these pocket pistols was more of an annoyance than a danger, especially considering the ball would have to likely pass through a heavy great-coat, a leather jerkin and several layers of other clothes before getting to the assailant. However, the screw-barrel design used a ball larger than the barrel (in this case 0.490), and screwing the barrel onto the ball seated on the frame partially swaged it to the bore. When the pistol fired, a great deal of pressure had to build up before the ball was fully deformed and could pass through the bore. This gave the pistol much more muzzle energy than could be obtained from a patched ball load. The photos below show the loading sequence, and the last frame shows how the ball is deformed to the barrel diameter when it is fired.
The table below shows the results with the two pistols. A .395 patched round ball (from the original box) was compared to the screwed-in .490 round ball. The results are dramatic; the patched ball might be deadly in a direct head shot, but it would likely not penetrate heavy clothing. The swaged ball, however, generates a very respectable muzzle energy, just short of that from a standard velocity .22 long rifle cartridge fired from a 22" rifle barrel (114 fpe).
The accuracy of the pistols from a distance of 15 feet into a man-sized target was better than I expected. I could place all shots into the target, but I had to concentrate on keeping the pistol steady after the hammer fell. Because the pistols have a vertical touch hole, there is always some 'fuse effect', which causes a small but perceptable delay in firing. This little pistol would not have the knock-down power of the boot pistol, but it packs quite a punch for its size.
| Load | 10 Grains Swiss 3F | 10 Grains Swiss 3F | 7 Grains Swiss 3F |
| Ball | .395 patched | .490 (screwed) | .490 (screwed) |
| Ave. Velocity | 253 | 482 | 387 |
| Energy (fpe) | 13.2 | 91.5 | 59 |
